Showing posts with label nail polish. Show all posts

Tuesday, January 10, 2012

Urban Outfitters Sale Purchases

Since Christmastime is over and all the holiday sales have begun, it's a good time to go looking for awesome deals! All Christmas-candles that were previously $18 at Urban Outfitters are now $4.99!! I purchased one that smells like Christmas trees and I love it! I might get even more if they have one of those 50% off sale item days. Unfortunately, it appears as though the candles are still a whopping $10 online so you'll have to go in stores to find this deal. On top of that I got two pairs of stockings for $20 (but they're really nice ones and good quality to boot). Then, I saw some fun things that really caught my eye that I wouldn't have otherwise purchased... a glitter set that was originally  $18 that I purchased for $4.99 and a glow-in-the-dark nail polish set with a silver crackle nail polish which was also the same price.

At their original prices of around $20, I never would have purchased these, but this little glitter set is very useful for manicures and makeup or can be dusted all over your body for a fun look (you can even spread it on with your body lotion!). There's absolutely so many options for these fun things I've purchased but I don't see them online to show you the sale.  You probably have to go in stores for these great end-of-the-line bargain prices. I've never had glow-in-the-dark nail polish so I'll have to get back to you guys on how this works or if it does at all!

Glitter set

Glow-in-the-dark Nail polish and Silver crackle polish


Monday, January 9, 2012

Lace nail art design

Are you looking for a fun and easy interesting nail trend to keep you away from the hum-drum same styles you're used to doing all the time? This is a simple and fun look involving lace that you can purchase anywhere (even at the dollar store). I stumbled upon this look and was absolutely shocked at how breath-taking these nails can look for how little effort it requires. What do you think about this look? You can choose to do the lace all over your nails, on fake or real nails, or you can choose to just do portions of lace randomly placed on your nails. I personally am a fan of the unique nails, each nail looking like a different lace portion of the same pattern, whichever piece strikes my fancy on each finger.

What you'll need:
- Base coat (any color you choose)
- Top coat (clear nail polish)
- Small-patterned lace (so it fits over your nails, honeycomb pattern is simplest to work with) in any color
- Small nail scissors
- Nail art pen (if you choose to draw more designs like swirls or dots over your lace to add intricacy)


This is actually a very simple process to do. First, you will want to cut out the portions of lace you want to use and measure them up with your fingernails. Once you've gotten all the pieces cut out (or you can go one by one if you choose), you want to apply a base coat (it can be clear nail polish or nude/colored opaque, you may even want to consider glitter polish if you're going somewhere fancy). This look doesn't require any extra glitz and glamour, however, because the lace will present so well on its own. After you apply your base coat, wait until it's dry and apply a clear coat of nail polish generously over top, gently use a tweezer and position your lace on top of the clear coat before it dries. This is important because you want the lace to tack onto your nail by sticking to that clear coat very well. After everything is dry, soak it up one more time with another clear coat of polish over top so that your lace won't frill or come off during hand-washing or rigorous activities! If you want your nails to be even more interesting,  you can draw on borders, swirls or dots (even cheetah prints with little 'c' shapes) with nail art pens. Remember to be creative and use different colors of lace, nail polish, and nail crystals over top to keep your nails looking very cool! Your friends will envy you for your expensive-looking manicure; you don't have to tell them you did it yourself!

Friday, January 6, 2012

Sephora OPI Sale!!!

This post is for all of you gourmet nail polish lovers that refuse to coat your nails with anything but the best! If you go to Sephora's website, you can just click this link to easily get into the sale portion of their website. I didn't see a button or link for it anywhere on their main page so I got it using Google, it was a trick someone taught me from a makeup board. You can choose to sort all of their items on sale by price, which will show you everything from the cheapest price to the most expensive.

Now before you get too excited, there is something important to realize: not all of the colors go on sale, it's mainly just the seasonal ones. However, they're full-sized bottles and it's still a great deal, so if you can find a few that you like, it's worth it! Here's a list of the colors that have been reduced in price from approx. $10 to $5 or $6.65 here and the link you can find them at. I've also included photos from fellow bloggers, thank-you for your contributions to this article!

Countdown to the Kiss: opaque royal blue with medium glitter (item # 1355981) ---> $5


Don't be Eggnogious: clear with medium and chunky copper glitter (item # 1355999) ---> $5


New Years Red-Solution: opaque metallic golden red (item # 1356013) ---> $5


Stop Stocking Me: opaque metallic golden plum (item # 1356039) ---> $5


Tempted by Teal: opaque metallic teal (item # 1345132) ---> $6.65


Going Nude, Eh?: opaque light milky neutral (item # 1256973) ---> $5


Blasted Nail Colors : blasted effect opaque metallic sapphire blue, midnight blue, maraschino red, metallic turquoise, and bright white ---> $5

I couldn't find any great photos of this collection per se but this is what crackle nailpolish looks like, the 'blasted' is supposed to be a slightly milder effect, but it probably looks the same.

From the Katy Perry Crackle Nail Collection by OPI

Saturday, November 26, 2011

Black Friday madness

So, after am enormous Thanksgiving meal, those of us dedicated to shopping, haul our fat butts out the door and waddle on to our store destinations. We do this, hoping against hope that we'll be amongst the first ones there. This is almost never the case, as people have been camping outside of the most popular stores (like Wal-Mart, Target, and Best Buy) for days in advance even in suburban localities outside of Seattle. So without any hope of ever reaching a cash-register within the next 12 hours at any of these stores, my husband and I moved onto ULTA. This store was the complete opposite, it had cutesy deals, very few ladies inside, no pushing or shoving, and we could easily reach the cash register. To me, the decision was simple, I'm a much larger fan of cosmetics than I am of technology anyway, so I picked up a few things.


They had this collection of items which were all just $1, so I grabbed 5 CHI Silk-infusions bottles for $5 because I love the way these make my hair feel (a small bottle usually retails for $14). Then, I purchased a mint lip-balm, swirl lipgloss and 3 ULTA nail polishes for another $5. Most of the items are $3 each, so the savings is of 66%. I purchased two Stila eyeliners in a pack, one being gold (named Koi) and one being silver (named Silver Dollar) as this was on special for $10 when the regular value is around $40, you can still get this deal here. I thought it was a great deal and Stila's smudge stick eyeliners are absolutely fabulous. The pigmentation is strong and they glide on very smooth and easily, they are absolutely perfect for the holiday season. I spent $20 in total on these items and ULTA gave me $5 Bonus Cash, which can be redeemed on the next $25+ purchase at their store. I was very happy with the overall experience.

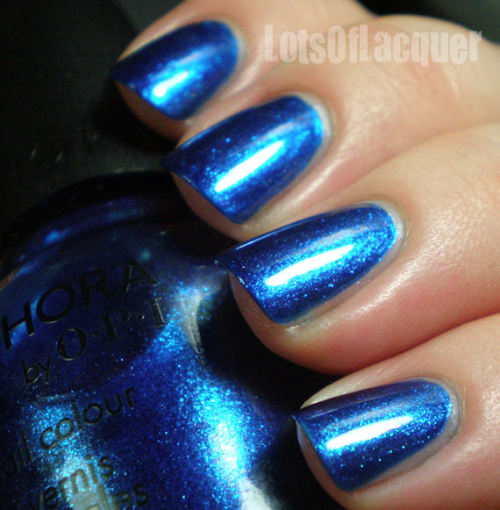
Colors: The Jungle Look, Alter Ego, Scene Steel-er
I was drawn to the nail polish because the color was very pigmented and festive, also the price was right and I was looking for more colors to perform my 'water-marbled nails' look! This is a fun and funky way to set yourself apart from everyone else.

The next day, armed with new ambition and rigor, we headed out to Southcenter Mall in Renton, Washington. This place was controlled chaos. The parking lot was chock full of cars, there were tons of security guards throughout the mall, but if you can stand feeling claustrophobic, it was a fine shopping experience. The lines to cash out were not that long, especially at MAC. I went to use their BACK2MAC program where I recycled 12 containers and got 2 eyeshadows of my choice, in the colors Brown Script (matte2 finish) and Swish (frost finish). These colors are both very beautiful, and best of all, they were free! The color pay-off is great, as with all MAC eyeshadows and you can de-pot them (which I did) and then recycle these containers as well when you have 6. I only purchased a 15-color palette to house my colors.

MAC's Brown Script (Matte2)
MAC's Swish (Frost)
I hope you all had an amazing Thanksgiving and I would love to hear about your Black Friday deals! Stay tuned for our IKEA haul in an upcoming post!

Friday, November 18, 2011

Water-Marbled Nails

Finished design from this tutorial
Do you want to achieve salon-grade manicures at home with interesting designs but you're not very artistic? Well, I have the solution for you. Don't bother spending your money on magnetic nail polishes or nail polish strips, you can learn to do this right at home without having to go out and purchase anything.


Tools for this project
What you'll need:
  • Q-tips
  • Toothpicks
  • Nail polish colors (at least 2, must not be fast-drying)
  • Top-coat (can be fast-drying)
  • Nail polish remover 
  • Nails (real or fake will do)
  • Tape (any kind really)
  • A disposable cup
  • Room temperature water
  • Paper towels

You will want to prep your nails before you do anything else and make sure they are well cleaned, and apply a coat of nude colored nail polish so that the variation in color in your own nails does not affect the water-design and show through. Then you will want to set up your work space by placing down a paper towel to cover the table you're working on so you don't get it all dirty. Fill your disposable cup about three quarters of the way up with room temperature water (you can use filtered or tap water, some people say filtered water is better because there will be less bubbles in it). It is important that you use room temperature water because hot water will cause the polish to spread too fast and cold water won't let it spread enough. Place tape around your nail and on your fingertips so that you don't get your fingers all messy and have to go back with tons of acetone to clean them off. This step is a definite time-saver, although it may not seem so at the beginning.

Open your nail polishes up because time is of the essence when you are doing this, this doesn't mean rush, be meticulous but quick. Carefully place a drop of nail polish in the water and then place the next color inside the middle of the previous color. Do this over and over until you have your desired bulls-eye of colors.

Then use your toothpick to swirl the polish or drag it in and out to create a pattern. My personal favorite is starting from the second line and dragging it into the middle, but make sure you do not pull up, push the toothpick into the middle so that the nail polish does not separate. Wipe your toothpick clean after each swipe with the toothpick because the colors will stay on it and affect your design in a not-so-pretty way when you place it back in.


Place your fingernail down into the water wherever you think the design looks nicest. You can even put all of your fingers in at once if you want a random-looking swirl on each finger. Do not lift your fingers out of the water immediately. You will want to leave your fingers in the water and wait about 30 seconds until you take a q-tip and clean out the excess polish in the water (around your fingers). This will clear away any potential polish like a thin skin so that it does not affect your beautifully designed nails. Then you can lift up your nails. Wait a little while for them to dry and then remove the tape from around your fingers carefully so that you do not smudge anything. Use a q-tip dabbed in nail polish remover to clean up the sides of your nails and your cuticles of any nail polish. Repeat this process with all of your nails.
Before removing the tape
After removing the tape


Apply a topcoat as the final step to stabilize your design and make it glossy and this will also help to get rid of any excess water bubbles floating on the surface of your nail. You can make all kinds of designs with this technique, I only experimented with two nails so far but I've seen some beautiful designs on Google!

Thursday, November 17, 2011

DIY: Make your own glitter nail polish!

This is a very interesting idea and you can either make these for yourself if you're tired of the same old boring nail polish colors that you see at the store or aren't willing to pay a lot of money for new shades. You can either give these as stocking stuffers or gifts to your friends and family.

You can make your own glitter nail polish very simply and the tools you will need are as follows:

  • inexpensive topcoat or nail polish in any color
  • nail glitter or crushed makeup pigment/mineral eyeshadow
  • funnel (or a makeshift funnel made out of paper)
First you will want to take your selected nail-polish or topcoat (choose a topcoat if you want the glitter to be on a clear background) and shake it up so that it is homogenized. Then you should choose which colors of glitter you want to use, they can be chunky glitter or fine mineral pigments and they can even be both. What you choose should reflect your personal style and you can achieve infinite amounts of different looks with this technique. Then you will want to funnel your chosen glitter, one at a time, into your nail polish bottle. Finally, all you need to do is shake your bottle and make sure you get the glitter evenly distributed throughout. This is a great way to make inexpensive nail polish colors from the 99 cent drugstore brands (like Wet 'n Wild).

As a tip for application, if you want to achieve a gradient effect, so that the tips of your fingers look as though they were dipped in fairy-dust, apply your first coat of transparent glitter nail polish starting a quarter of the way down your nails (if your cuticles are the uppermost, as in the picture above). Then apply the second coat only on the bottom half, and finally the last coat (or as many as you need for the desired effect) only on the bottom quarter