Showing posts with label makeup. Show all posts

Friday, January 13, 2012

Eye Makeup Application Mistakes

Do you often make mistakes when applying your eyeshadow? Do you put too much on and it falls all over your eyelashes? Is your winged eyeliner a constant failure? I'm gonna share with you simple tips and tricks about how to make these mistakes work in your favor, straight from makeup artists I've worked with in the past.

What I've been told numerous times is that the more messy you are with your color application, and the more you blend it out, the better it will look. Does that mean you should apply a ton of color at once? No. It does, however, mean that you can apply whatever is on your eyeshadow brush fairly liberally without worry, as long as you're hitting your target area pretty closely (ie. if you're going for color on your eyelid, make sure you don't put the eyeshadow up to your eyebrows). This is someone anyone with basic motor skills can accomplish, but did you know how to fix your mistakes? If your color spills too much over your eyelashes, what do you do? Do you try to comb it out with a lash brush or pick it out with your fingers? You should do neither of these things because you are likely to irritate your eyes if you fidget with them too much. A simple and aesthetically pleasing thing to do is to get a good thin formula for mascara (such as Clinique or Lancome's mascaras) and apply it in thin coats over your eyelashes that have been covered in powdery eyeshadow. This seems like it would be a bad idea but it isn't because the powder will add much needed volume to your lashes, so rather than having to put on fake eyelashes, you can simply amplify your own this way. The powder will not budge once you have thoroughly coated it in mascara. Make sure not to over-apply the mascara because you don't want bulges and flakes of it.

I always apply my eyeshadow first so that I don't have fallout of whatever color I'm using (usually the darker toned colors are more problematic) on my cheeks after applying my foundation and blush. For this reason, it is always wise to do your eyeshadow first and your concealer, foundation, powder and blush last. You also want to be able to rest your hand on your face so you can anchor it steadily when applying your eyeliner as it will help with the accuracy of your application.

Do you mess up your eyeliner a lot when trying to get that winged look? My simple solution is using a q-tip dabbed in a little bit of makeup remover solution and cleanly removing it, waiting for it to dry, and re-attempting the wing. However, if you make a mistake over your eyeshadow on the eyelid portion of the eyeliner line, you are better off covering your mistake with eyeshadow and a very fine-pointed brush for precision, and then re-applying your liner in a cleaner way. I hope these simple tips helped and you will be less frustrated when making mistakes! You also shouldn't feel like you have to begin all over again because you've made one tiny mistake, there are always ways to fix it.


Friday, January 6, 2012

Sephora OPI Sale!!!

This post is for all of you gourmet nail polish lovers that refuse to coat your nails with anything but the best! If you go to Sephora's website, you can just click this link to easily get into the sale portion of their website. I didn't see a button or link for it anywhere on their main page so I got it using Google, it was a trick someone taught me from a makeup board. You can choose to sort all of their items on sale by price, which will show you everything from the cheapest price to the most expensive.

Now before you get too excited, there is something important to realize: not all of the colors go on sale, it's mainly just the seasonal ones. However, they're full-sized bottles and it's still a great deal, so if you can find a few that you like, it's worth it! Here's a list of the colors that have been reduced in price from approx. $10 to $5 or $6.65 here and the link you can find them at. I've also included photos from fellow bloggers, thank-you for your contributions to this article!

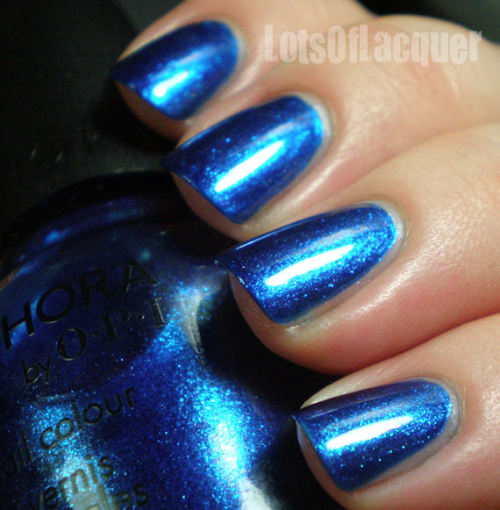
Countdown to the Kiss: opaque royal blue with medium glitter (item # 1355981) ---> $5


Don't be Eggnogious: clear with medium and chunky copper glitter (item # 1355999) ---> $5


New Years Red-Solution: opaque metallic golden red (item # 1356013) ---> $5


Stop Stocking Me: opaque metallic golden plum (item # 1356039) ---> $5


Tempted by Teal: opaque metallic teal (item # 1345132) ---> $6.65


Going Nude, Eh?: opaque light milky neutral (item # 1256973) ---> $5


Blasted Nail Colors : blasted effect opaque metallic sapphire blue, midnight blue, maraschino red, metallic turquoise, and bright white ---> $5

I couldn't find any great photos of this collection per se but this is what crackle nailpolish looks like, the 'blasted' is supposed to be a slightly milder effect, but it probably looks the same.

From the Katy Perry Crackle Nail Collection by OPI

Thursday, January 5, 2012

Lancome's Newest Collection: Roseraie de Delices

Lancome's latest Spring 2012 collection by Aaron De May, their artistic director who is known in the industry as somewhat of a beauty genius (although he somewhat resembles the crypt keeper, see below for reference images), is an absolute beauty to behold. I want every single item they have put out for the collection and I'll show them to you so you can 'oooh' and 'aaaah' yourself.

Crypt Keeper


Aaron De May - Artistic Director of Lancome


As if Lady Gaga hadn't already told us in her latest music video for 'Marry the Night', mint is definitely going to be the huge color trend for Spring 2012 (she had insider information from Calvin Klein, Chanel and the likes) and that's okay with me because it is a delicate, feminine and fresh color. Without further adieu, I present to you the fabulous 5 color all-in-one shadow and liner compacts in Vert Tendresse and Rose Romance!


There's so many options with these! There's lid, crease, shadow, highlighter and liner in each of these, you can mix and match the colors for many different looks and combinations. The rose palette consists of peach and rose tones with a burgundy liner, while the green palette containing mint and forest greens with a darker grayish green liner. I love all of the colors because they have a shimmery iridescence to them that feels youthful and joyous. However, the cost of these is a little steep (as to be expected with Lancome products) at $48 each.

Now, I present to you what *really* caught my attention in this collection, the illuminating smooth powder which is a mixture of rosy pink and pastel shimmers. It's an all-in-one product for the cheeks and face, so you can use it as your face powder and blush, as well as highlighter (the parts that are more shimmery). The cost is, again, steep at $42, but it is such a beautiful item that appears to look like a bed of roses that it almost makes it worth the price.
My least favorite items in this collection are their waterproof eyeliner pens in green and white, I'm not a huge fan of their formulation, it's a little greasy for my taste,  but some people like that. Also, they're expensive at $25.50 each and you can probably find something similar in a drugstore.


The lipstick in this line is kind of adorable because the limited-edition packaging for the cotton candy shade and the color itself are the cutest. However, the 'Le French Touch Absolu Nu' lipstick costs $35 because of the packaging, while the rest are $29, $6 for packaging, Lancome?? Really??? I know that packaging didn't set them back anything so why are they overpricing? 'L'Absolu Rouge Nu' comes in the colors 'Sweet Marmalade' and 'Rose Petal'.
L'Absolu Rouge Nu in Sweet Marmalade
L'Absolute Roughe Nu in Rose Petal


Limited Edition - Le French Touch Absolu Nu in Cotton Candy

Monday, January 2, 2012

Using lip pencils as eyeliner

If you find that the formulation of the pencils is similar, you can substitute your lipliner (given that it is in a neutral shade and not some bright red or pink) as an eyeliner. If the chosen color is too red,  you will end up looking like a zombie. MAC lip pencils, such as Chestnut or Cork, can be very neutral and lend themselves to doing double duty as eye and lip liners quite well. They are creamy but hard enough so that they won't fall off your waterline (just above your lower eyelashes). I came across this quirky idea when I walked into a MAC store and was looking for a lighter-toned eye pencil that was neutral and not bronze, but was different enough from Teddy and Coffee, which I already own. 'Lo and behold I see Cork and I didn't even realize that it was a lip pencil at first, but I purchased it regardless because it seems to be made of the same minerals and chemicals as their eye pencils and it was such a beautiful color.

MAC's Lip liner in 'Cork'

Normally, I air on the side of caution when it comes to using products that are intended for one part of your body on another part of your body, specifically the eyes. However, this is a rare exception, because MAC is a well renowned company with amazing quality products and make-up products for your face tend to have the same ingredients in them regardless of whether they are for your cheeks, eyes, lips, or all over your face. This is why many makeup companies make all-over color sticks which can be applied anywhere you'd like. If you think you will be irritated by it because your eyes are sensitive, simply apply the color on the area outside of your eyelashes and that should be protective enough so that you won't have any adverse effects. Try to steer clear of anything that's waterproof or a 'stain' for your lips because these might stain your eyelid and could make it look pretty horrible. If you invest your time and money into good makeup and are careful about what you're doing, this is a substitute that can be made easily using the right products, obviously don't put anything from the dollar-store or unreputable brands on your eyes. Also, make sure that the lip pencil that you are using isn't too pointed and hard because you can harm the sensitive skin of your eyes, go for a creamier, smooth consistency pencil. Always try these out on your hand and other parts of your body before you attempt to put them on your face. Lip pencils are also very good for filling-in your eyebrows, so you really don't have to be limited by specific products in your color selection process. 


Tuesday, December 6, 2011

Urban Decay NAKED 2 Palette Review

If you know me, you may know that I am a huge fan of the original Urban Decay Naked palette. Such a huge fan, I've been using it since it first came out and love it so much that I try to use a bare minimum of the colors so I don't run out (I realize it's now back in stock, but it wasn't for a really long time at one point!). So imagine my excitement when there was an announcement on Urban Decay's website about something new arriving to do with the Naked line. I instantly rushed to the conclusion that they were going to have another palette, as did many of my fellow makeup junkies. However, many called up the company and were repeatedly told that it would not be another Naked eyeshadow palette. They were lied to. Behold, the new Naked 2 palette by Urban Decay:


Extras that come with the Naked 2 palette
Let's start with the main differences: The Naked 2 palette comes with a dual-sided brush, one side is a shader and contour brush, while the other side is a regular (but very well made) eyeshadow brush. These brushes are of the highest quality and they are from the Urban Decay Good Karma brush line, consisting of the Crease brush and Eyeshadow brush, I have provided links if you are interested in purchasing them separately. This is a nice touch over the dual-sided liner that you got with the original Naked palette, just because people are likely to purchase both and you don't really want to double-up on liners, especially since almost all of their palettes come with the 24/7 pencil eye liner. You also receive a travel-sized lipgloss from their Lip Junkie line in the color 'Naked', this is a really cute added bonus and fits perfectly in your purse for on-the-go touchups. Online, I received a free sample with the order and it was a mini 24/7 glide-on eye pencil in ElDorado. I'm happy about this eye liner because it's a shade I've never tried and am excited to experiment with! However, you won't be getting this necessarily, you may get other samples or colors if you order the Naked 2 online (Sephora won't be giving out free samples with purchase when it hits stores).

If you're looking for a giant change in this palette, you won't find it. The colors are not astonishingly different, they are in the same line of products for a reason. There is an overall neutral theme, but Urban Decay claims that there are more taupe and greige shades in the new palette. I wouldn't say that this is true, however, because the most prominent color is probably bronze (as 5 of the colors learn more towards bronze). There is most definitely a movement away from the overwhelming bronze overtone of the original Naked palette. I will go over every new color and tell you what the comparison is between the new and old one. Foxy is a new and unique shade and is not duplicated whatsoever. Half Baked, unfortunately, is exactly the same in both palettes (this was kind of a cop-out in my opinion, they could have attempted to make a new color here). Booty Call is very similar to Virgin from Naked 1 but it might be a tad more on the peach side. Chopper is orangey and does not appear to be similar to anything other than a lighter cross between Half Baked and Suspect. Tease is a brand new taupe and is matte, but it would be very similar to Sin (Naked 1) if it was shimmery. Snakebite appears to be a shade in between Half Baked (Naked 1) and Smog (Naked 1). Suspect appears unique like a slightly less glittery version of Sidecar (Naked 1). Verve and Pistol appear to be unique colors, they are lighter and are more along the greige spectrum Urban Decay was looking for. YDK is like a mixture between Sidecar (Naked 1) and Toasted (Naked 1). Busted is really just very similar to Hustle (Naked 1) but slightly more maroon. Blackout is unique because it is a matte black eyeshadow and Creep (Naked 1) was sparkly.

Naked Palette (Original)

Naked Palette 2
 I hope you found this review helpful when considering if you would like to purchase this palette or not. It retails for $50 and it really is a great deal because you're getting 12 full-sized eyeshadows (which normally retail for $17/each from Urban Decay), two eyeshadow brushes (which each retails around $26), a free lip gloss, and a free sample from their website. The deal on this is phenomenal and it would make a great Christmas or Hanukkah present for that special girl in your life. I promise you nobody would be disappointed if they received this as a gift. I am ecstatic, my husband purchased this for me as a birthday gift and I couldn't be any more over the moon. I'm a long-time fan of their original and I love this one too. These shades are really practical and you will use this palette every day because it is so versatile.
Side by side comparison of Naked 2 palette (top) vs. original Naked palette (bottom)


Sunday, December 4, 2011

Different concealer colors: What are they for?

Do you find yourself shopping for concealer and looking at a rainbow of colors, wondering what the difference is if you buy a pink, yellow, or green? I had this problem and never knew what they were used for so I limited myself to purchasing the nude shades which literally were the same as my skin tone for fear that I would start to appear clownish with the rest. Fear not, however, because I'm going to tell you exactly what they're all for so don't be afraid to add them to your arsenal of blemish and imperfection coverage.

In general, concealers hide dark circles, scars, pimples, and really any skin flaw you can think of. It's always important to consider whether or not your concealer is of adequate quality and won't cake on your face, as this will make you flaws stand out even more (not exactly your intended result, is it?). Concealer colors are all about neutralization, since most of our skin's imperfections have a color hue to them. For example, your under-eye circles tend to be blueish in hue, many people have redness on their faces, and pimples can be plenty of colors. As for imperfections that aren't affected by color, such as wrinkles and fine lines, we would stick to using the neutral concealer that just matches your skin tone and foundation.

Let's take a look at the color wheel because it holds the key to the mystery that explains what all the various colors of concealers can do for your skin. The theory is that colors on the opposite end of the spectrum (so right across from each other, the way violet is to yellow) cancel out or neutralize each other. Therefore, if you had a yellowish blemish on your face, you would want to use the lavender concealer to neutralize the color before you put on your foundation (foundations generally will not cover up blemishes unless you use a ton, and rather than making your face look like a kabuki mask, you should use concealer). Mint green concealer is used to combat redness such as inflamed pimples and rosacea (redness due to capillaries being too close to the skin). Yellow shades are used to hide nasty veins that may be seen, and the same goes for orange shades which are usually for purple and blue bruises as well. Baby blue or lavender concealers are used to even out your skin, for example if you have bruises or birthmarks that you want to get rid of. The three general concealer colors are yellow, lavender and green. Yellow or apricot warms the skin color and counteracts discoloration on top of its already mentioned uses. Lavender concealer brightens dull skin and can even be used to conceal very dark under eye circles (but not in fair skinned people generally because the dark circles won't be dark enough and can be handled with yellow). Green concealer minimizes redness is general so this color is the most useful for people with red blotches or port wine stains around their mouth as well.

If you have tattoos and you want to cover them up without spending a pretty penny for your tattoo concealers, use the regular drugstore concealers but consider the color of your tattoo. If you have a blue tattoo, use a concealer that is yellowish and make sure that you have a waterproof formula as well as applying a translucent powder on top to set the product for the longest staying power possible.

Below is a collection of concealers that I am familiar with and that have worked well for me at a reasonable cost.

Saturday, December 3, 2011

Changing your beauty routine with age

As time goes on, we realize we no longer look the same as we used to as teenagers and our makeup techniques have vastly improved and changed. The reason for this is to keep your look trendy and fresh but also age appropriate. Any products you use should naturally enhance your beauty rather than try to cover it up and change it to make you look like something you're not.

Under eye care
Aging skin requires that we use products with firming nutrients, but it doesn't mean that you have to be old to use them, I believe that if you use firming products from your twenties, you will look younger in your fifties and sixties. Under your eyes you can see the wrinkles and crows feet that really bother you when you look in the mirror. Packing concealer into here will not do you any good, as the concealer will set inside your wrinkles and make them pit even more. You will want to start by applying moisturizer and anti-aging firming cream under your eye by patting it on with your ring finger (never pushing it in as the skin is thin and will easily be damaged). Then put aloe vera gel or primer in the area where you have bags and wrinkles to seal your wrinkles before applying your concealer.

Color change
As we age, contrasting colors may look too stark and draw attention to our little wrinkles and imperfections. This is why it is a good idea to change your eyeshadow shades from dark/light contrasts to more muted neutrals  and browns, steering clear of blacks and saturated colors. Mature women tend to look best in dark brown mascara as the stark black tends to be too dramatic. Stick to lighter colors of blush, rather than going darker, over time. You want your cheeks to look rosy and young rather than old and gloomy. To avoid getting that smeared look that you can get with cream blush, stick to powder blushes. If you are already adept at using cream blushes, then get a lighter rosy color because at least this formula will hydrate your skin. Rose-toned blush works on all skin types and colors. You may want to consider using mineral makeup because the colors have more of a sheen that will bring light to your face and it has a dewy finish.

Lip-care
We all get small wrinkles all over our lips and that line around our lips, creating an unappealing sad-clown look. Use lip moisturizers/balms constantly to hydrate your lips, especially before you put your lipstick on. Exfoliate to get rid of excess flakes of skin. Line your lips with a lip liner, but do not go a shade that is darker than your lipstick because this is a dated look that is not suited for our modern lives. The purpose of lip liner is so that your lipstick will not run out of the lip line and into your wrinkles, this is a great trick to use.

Here are some inexpensive items you can order online that I recommend if you want to follow the tips in this post!

Friday, December 2, 2011

Snow Bunny Beauty Tips

Are you going skiing or snowboarding this holiday season? Do you just want to be able to look and feel great while wearing layers of clothing, without having to worry about your beauty products rubbing off on the collars of your jackets, insides of your hats, and scarves? This article will tell you how to get the snow bunny look without all the mess (and without all that skiing, I'm more of a hot chocolate by the fire kind of girl myself).

If you're going to be out in the cold, you will definitely want to consider getting a good strong moisturizer for your face and any other skin that is exposed as the cold weather can be very harsh and detrimental for your skin. Use a sweat-proof sunscreen on the body parts you will have exposed to the sun (even in the winter months it will burn you). Make sure you blot away any excess greasiness from the cream and sunscreen with a tissue before you do anything else, this will help the staying power of your makeup.

Then, primer is a girl's best friend during the winter months, so use a colorless gel-like primer or my personal favorite aloe vera gel, and cover your entire face with it. Stay away from cream-based eyeshadows and powders because they will definitely smear onto your clothing, as will anything with an oil base. You can choose whether you want to wear liquid blush or powder blush, but anything you put on must be covered by a translucent powder to set it (this includes your foundation) and reduce the amount of staining it will do to your clothes.

For a frost-inspired eyeshadow look, use colors that have a sheen and are pearly pales, such as white, silver and lilac. These colors look pretty and feminine but still retail that iced-edginess when put on correctly. Apply your lightest color (white) under the base of the eyebrow as your highlight, your mid-tone (lilac) on the eyelid itself and your darkest shade (silver) as the contour surrounding your eyelid.  Line your eyes with a waterproof kohl pencil for the most staying power (or a truly waterproof eye liner if you can find one) and use a brush to smoke out your eyeliner a little for a sultry gaze. To smoke out your kohl liner, use a black shimmer and extend it into a winged line to elongate your eye.

Make sure you blend everything together beautifully. As a final touch add the lightest color to the inner corner of your eyes generously and apply shimmer powder to your cheekbones, above your blush. For an extra-feminine snow bunny look, you can apply some fake lashes to the outer corners of your eyes, they will stay in place if you use Duo Lash Adhesive glue. Use waterproof mascara so that your sweat from snow sports will not make your mascara run. I would opt for a pinkish blush in a doll-like color, but don't go overboard because if your eye makeup is overpowering, we don't want your whole face to be brighter than the sun. For your lips, you will want to exfoliate to smoothen them out and then just apply a simple moisturizing lipgloss with SPF.

Have fun on the slopes or in the chateau drinking what makes you feel warm and fuzzy inside!

Saturday, November 26, 2011

Black Friday madness

So, after am enormous Thanksgiving meal, those of us dedicated to shopping, haul our fat butts out the door and waddle on to our store destinations. We do this, hoping against hope that we'll be amongst the first ones there. This is almost never the case, as people have been camping outside of the most popular stores (like Wal-Mart, Target, and Best Buy) for days in advance even in suburban localities outside of Seattle. So without any hope of ever reaching a cash-register within the next 12 hours at any of these stores, my husband and I moved onto ULTA. This store was the complete opposite, it had cutesy deals, very few ladies inside, no pushing or shoving, and we could easily reach the cash register. To me, the decision was simple, I'm a much larger fan of cosmetics than I am of technology anyway, so I picked up a few things.


They had this collection of items which were all just $1, so I grabbed 5 CHI Silk-infusions bottles for $5 because I love the way these make my hair feel (a small bottle usually retails for $14). Then, I purchased a mint lip-balm, swirl lipgloss and 3 ULTA nail polishes for another $5. Most of the items are $3 each, so the savings is of 66%. I purchased two Stila eyeliners in a pack, one being gold (named Koi) and one being silver (named Silver Dollar) as this was on special for $10 when the regular value is around $40, you can still get this deal here. I thought it was a great deal and Stila's smudge stick eyeliners are absolutely fabulous. The pigmentation is strong and they glide on very smooth and easily, they are absolutely perfect for the holiday season. I spent $20 in total on these items and ULTA gave me $5 Bonus Cash, which can be redeemed on the next $25+ purchase at their store. I was very happy with the overall experience.

Colors: The Jungle Look, Alter Ego, Scene Steel-er
I was drawn to the nail polish because the color was very pigmented and festive, also the price was right and I was looking for more colors to perform my 'water-marbled nails' look! This is a fun and funky way to set yourself apart from everyone else.

The next day, armed with new ambition and rigor, we headed out to Southcenter Mall in Renton, Washington. This place was controlled chaos. The parking lot was chock full of cars, there were tons of security guards throughout the mall, but if you can stand feeling claustrophobic, it was a fine shopping experience. The lines to cash out were not that long, especially at MAC. I went to use their BACK2MAC program where I recycled 12 containers and got 2 eyeshadows of my choice, in the colors Brown Script (matte2 finish) and Swish (frost finish). These colors are both very beautiful, and best of all, they were free! The color pay-off is great, as with all MAC eyeshadows and you can de-pot them (which I did) and then recycle these containers as well when you have 6. I only purchased a 15-color palette to house my colors.

MAC's Brown Script (Matte2)
MAC's Swish (Frost)
I hope you all had an amazing Thanksgiving and I would love to hear about your Black Friday deals! Stay tuned for our IKEA haul in an upcoming post!

Wednesday, November 23, 2011

The Foundations of Foundation: The Basics of a Healthy-looking face

Want to know how to make your complexion perfect? Let's delve into the world of foundation to even out your skin-tone and cover up any blemishes or unevenness that we all suffer from. Nobody is blessed with absolutely flawless skin, so don't feel bad about having to use one product or another to enhance your appearance because most women, and many men, do.
Remember when testing products out on your skin, do not apply them to the back of your hand because the skin there is a different saturation level altogether than the skin on your face, so look in a mirror and apply the tester-color to your neck. This is also a good way to see if your skin will have any allergic reaction to the product since the skin on your neck is very sensitive. A great makeup application is one that looks as natural as your own skin, so when looking for your ideal foundation or concealer, purchase something that best resembles your own skin.

When it comes to price-point, I'm not one to encourage the purchasing of expensive foundation products because, let's face it, they all contain harmful chemicals in similar amounts. So, if you're going to burn through a lot of product, you should opt for the drugstore brands rather than the expensive designer stuff. I personally have been very satisfied with the performance of L'Oreal's liquid foundation in the 'Visible Lift' and 'Infallible' line, as well as Maybelline's 'Match Perfection'. The positive note about these drugstore brands is that they are also at least SPF 15 so you get that little bit of protection that your skin needs from the sun's harmful rays (yes, even in the winter). If you have a choice of which kind of bottle to buy your liquid foundation in, go for the one with a handy pump because it keeps bacteria out of your product and is the most hygienic of the bunch. 

If you're looking for a bit of a sun-kissed look, then opt for a foundation that has a little bit of a tint or go a shade darker than your skin naturally is. Always apply your foundation with either a sponge (which you should replace weekly at the latest) or a foundation brush (which should be washed regularly). All foundation brushes have the same bristle shape because it is ideal for applying your foundation to your skin. You will want a synthetic brush so the bristles do not get ruined from oil-based foundations and they are also easier to clean because the product will not penetrate the bristles, it will stay on top of them. If the brush does not absorb your product, you will also be using less product overall, thus creating less waste.

Coverage
There are various finishes and types of coverage when it comes to foundation products. Usually the terms refer to the opacity of the product, or basically how much it will cover up your own skin. Sheer coverage is very transparent and will not hide your pimples and problem-areas but it will do a fairly decent job of evening out your skin-tone if that is all you're looking for (though, I would say that most of us need more coverage). Light coverage is basically the same except that it will cover very small colored-spots on your skin, such as freckles. Medium coverage is higher up on the scale and can cover blotchiness, discolorations, freckles, and some scarring (something that falls into this category would be a tinted moisturizer). Full coverage foundation, the kind most people probably are using at the moment, is very opaque and will cover anything you need it to camouflage. It is important that when you apply full coverage foundation, you do so very carefully, making sure to use a brush or sponge to blend the color all the way up into your hairline and under your chin, down to your neck. Otherwise, others will be able to see a visible difference in color and consistency between your skin and the foundation (even if you've chosen the perfect shade for you).

Choosing a shade
Sometimes it's hard to tell exactly what skin-tone we are, because much of it depends on which light we're looking at ourselves under. It is also important to realize that it is a complete misconception which says fair skin is cool-toned and dark skin is equivalent to warm-tones. This is not always the case as you will come to realize. Your shade can either be cool or warm, and within each of those categories there are sub-categories of light, medium, and dark. 

Cool-toned light and medium skin has a pinkish cast and the inner wrist of the person contains more blue than dark veins. These individuals are highly likely to burn in the sun very easily. The darker shades in the cool-tone range have a blueish cast to their skin, have more blue than green veins, and can also burn easily. Warm-toned skin that falls in the range of fair to medium has a greenish cast and these people have more green veins than blue veins on their inner wrist (the exact opposite of those with cool-shade skin). This group is more likely to tan in the sun rather than burn easily. Dark warm-toned skin has a chocolate tone and shares all the same qualities with their fairer skinned group. 

Make sure you know which category your skin fits into when you are purchasing your cosmetics. If you see 'NC' or 'NW' on cosmetic-codes (MAC uses these codes religiously in their concealers and foundations) know that it refers to 'neutral cool' and 'neutral warm' skin tones. You should stick to the one which best represents your skin tone for a flawless match. Some people can fall right in between, and in this case either of the shades will work for you.

Types of foundation
The types of foundation are classified according to their chemical base. Oil-based foundation is probably the oldest of the bunch, it has been around for a very long time, and the base is usually a waxy consistency or similar to petroleum. It provides the most coverage of all but easily smears and is really not practical to be using on a daily basis. 

Alcohol-based foundation is a specialty product because it is made for people with problem-skin. It reduces the chance for the makeup to clog your pores, it is a difficult application using cotton pads and usually has 'pore minimizer' in the name, providing only very sheer coverage. 

Powder or talc-based foundations are usually brushed on from a compact and they are 'stickier' than their loose-powder counterparts. Powder foundation is often used on top of other kinds of foundation for a fuller more-polished finish. One must be careful though, when applying this type of makeup, because it can look cakey and will probably need re-touching in warmer weather. 

Mineral foundation is slightly different because it tends not to use talc as a base, being more 'healthy' for you in general. The coverage of these solutions is medium at best because they are in loose powder format and do not have so many skin adhesives or chemicals, they are mostly made out of minerals mined from the earth. They usually give a nice shiny appearance which gives the illusion of healthy, dewy skin. 

Finally last but not least, my favorite all time foundation, water-based products! This is probably the most popular of the bunch and is a creamy liquid that can give you medium to full coverage, depending on your application (if you use it lightly, you will cover some of your problems, but if you use it heavily, you will cover everything up). I suggest using this product with a brush as it blends out much more successfully than with a sponge (definitely do not use your hands to apply this). 

Saturday, November 19, 2011

Bacne: Back+Acne Treatments

Whether you're an athlete, a teenager, or just like everyone else, you may be afflicted with acne or pimples on your back. It is classified as zits that come up on your back, chest and shoulders inclusively. There are some mechanical ways to make sure that you don't breakout or contain your current breakouts. If you notice that you are starting to get some, you may want to wear loose clothing which is newly cleaned because you want only soft cotton fibers on your skin as they will remove excess sweat and skin flakes. If you're a girl and you wear a bra, try to wear a new one every day for this same hygienic reason. Your straps should fit well and not chafe against your skin throughout the day, but if you find that you get breakouts regardless, then try to switch to a strapless bra. Sometimes your acne can be an allergic reaction to your laundry detergent or the fabrics you are wearing, so try to eliminate any possible allergens. Bacne is formed when your pores get clogged by when excess sebum formed by your sebaceous glands and dead skin cells attracts bacteria. The reason why your back is so prone to acne is that there are more sebaceous glands here than most other places on your body.

Washing regularly
First and foremost, this should go without saying but it is definitely worth reiterating: if you want to get rid of your bacne, you must wash every day. Using anti-bacterial soap during your daily (and even twice daily if you have the time) wash will help eliminate the bacteria in your pores. Don't over-scrub or over-wash the area because you can irritate your skin and cause it to become too dry. If your skin is too dry it will go into panic-mode and release too much sebum to cover itself up, leading to more acne. You want to maintain a balance of moisture on your skin. Gently use an exfoliating sponge, loofah or washcloth during your shower (yes, you want to shower unless you are having a salt-water bath because soaking your skin in a pool of still water can increase your chances of getting more bacteria in your pores). Because the skin on your back is generally a lot tougher than the skin on your face, you can exfoliate gently every day and not just once a week, it is safe to do so as long as you're not worsening your irritation. Make sure that you wash your body with a medicated body wash that has two percent salicylic acid or benzoyl peroxide, specifically letting it sit over the area which has pimples before you rinse it off.

If you can get near a beach - alternative treatment
The simplest method to get rid of your breakouts is to visit the beach. Having your skin submerged in sea salt water for approximately ten minutes can drastically help your skin. No cream or cleanser will help your skin the way the ocean can because it has natural anti-bacterial properties. The warm temperature of the water helps to cleanse the skin. Sand also can act as an exfoliating agent and improve your complexion if you gently rub it on your afflicted area. If you can't get near a beach, then you can achieve the same effect by boiling a mixture of salt and water and letting it sit to the side until it has cooled. Use this solution to wash your face and body to get rid of dirt and oil.

Infuse moisture
Use a moisturizer after you wash your skin to increase the hydration level of your pores. However, make sure that the product you use is oil-free and medicated if your acne is severe. If you are already using a medicated soap or treatment, then use just a regular moisturizer without medication in it that is highly hydrating and is noncomedogenic, which means that it does not block pores, because this will reduce the incidence of pimples and will not allow the salicylic acid or benzoyl peroxide (pimple treatments) in your other products dry out your skin.

Medicated treatments
If you use medicated creams or gels, try to go for ones that say they contain benzoyl peroxide or salicylic acid but do not use both. If you use both of these substances together on your skin they can have negative effects on your skin and may burn your skin pretty severely. The burns from these products can be worse on sensitive skin than any acne, so you may want to consult with your dermatologist if you have a history of negative skin reactions. It is important that you use a hydrating cream over top of these treatments or after you clean them off because your skin will be dried out. These treatments are also bleaching, so make sure you don't put your clothing right over top immediately because you won't be able to repair the color.

The rule-of-thumb is that if you're using one product that is medicated, whether it be soap, treatment or moisturizer, you want them to either be from the same line of products or stick to just one of them so that there are no negative interactions between the chemicals used. You don't want to overload your skin with chemicals, it may have an adverse reaction to this. Rather than experimenting on your skin with harsher treatments if you don't know how your skin might react, I suggest going to visit your dermatologist. Some problems are too severe to take care of with over-the-counter treatments and regular body washes. Some treatments may take weeks to work and others may have no effect at all on you so you may want to seek help especially if you have deep, painful cysts on your back. If you have a serious affliction or problem, you may need an aggressive topical treatment or antibiotics, to avoid scarring and for the best possible results visit your dermatologist.

How to apply false eyelashes

Before adding fake lashes
Looking to spruce up your eyes and make your eyeshadow application pop? Well, this is a great solution for daytime or nighttime, just make sure you don't choose lashes that are too dramatic. A good way to tone down any pair of lashes you buy is to cut them in half and only apply one half of the lashes to the outer corner of your eyes. This will drastically reduce strain on your eyes and make them very wearable, and you don't risk looking like a clown (it also reduces your cost because you can turn each eyelash set into two separate sets).


One false eyelash cut in half can be worn on both eyes
First, do your eye makeup application in full, including your eyeliners, a cats eye look is great with false lashes because the winged tip of the eye liner masks the seam of the false lashes. Make sure your hands are washed and disinfected thoroughly before you attempt to place false eyelashes on because you don't want to get any nasty bacterial infection or allergic reaction. 

Then, you want to use a medical-grade lash adhesive such a Duo, I personally prefer the white formula which dries clear because it masks any mistakes you may accidentally make. Place a small dollop on the back of your hand after your thorough cleaning. Then, working relatively quickly before the glue dries (but don't worry, you have a good minute or more), run the backing of the eyelashes through the glue and let them sit for 15-30 seconds while the glue becomes tacky. 

Fake lash application
When placing the lashes, try to get them as close to your natural lash line as possible but do not, under any circumstance, place them over top of your actual lashes. Getting the glue in your eye can be painful and you want to avoid this. If you have a thicker eyeliner application, it makes putting your lashes on much easier because there will not be any skin-colored gaps between your lashes and the fake ones. If you are using a full-sized fake eyelash, you want to begin placing it down from the inner corner of your eye, and then tack on the outer corner, pressing down on the middle only after you have secured the ends. But if you are using my method of cutting your fake eyelashes down, then you will want to start at the outer corner and tack the end on where you feel it will look nicest (probably where your liner starts to wing out).

You can see from the finished picture that using only half of the eyelashes and turning them inside out (so that the shortest hairs go over top of your lid and the longer ones go to the outer portion of the eye) makes for a subtle, beautiful and feminine look. They look like an extension of your own eyelashes. You can finish off the look by adding black mascara to combine your own eyelashes with the fake ones for even more of a seamless look.

Completed half-lash application


Monday, November 14, 2011

Sephora Mini-Haul and Product Reviews

Lately, I find myself drawn to a particular texture of makeup rather than one brand or another: silky. Silky means that if you rub the makeup mixture in between your fingers, you feel as though your fingers are coated in the finest layer of silk with no bulges, imperfections, or obtrusions. I think powders with this texture will give the most airbrushed makeup look that you can achieve without actually using an airbrush (or even better than an airbrush, depending on which one you have). I used the VIBDREAM sale at Sephora for the holiday season (20% off all items purchased for Nov. 11-14th) for Very Important Beauty Insiders (people who have spent $350+ in a calendar year at Sephora). I was part of this program because my husband bought me the TEMPTU airbrush system as a wedding present, although we ended up returning it multiple times because of all the defects it had, but that's a story for another time.
I bought myself a tried, tested and true favorite: Diorskin Shimmer Powder by Dior, and then I decided to replenish my depleting quantity of Urban Decay's Grifter, feeling adventurous I purchased Kat Von D's Saint palette and the elusive Korres' Wild Rose Compact Powder (because Sephora is usually out of these). I'll be posting photos of all the products and swatches, as well as my impressions of all of them.

Diorskin Shimmer Powder
The original retail value of this shimmer block is $44, which is quite a hefty price, but it was definitely worth it with my discount. I personally buy the Rose Diamond set because of my skin's undertones, since it comes in either pinkish hues or beige/tan hues. Photos do not do this product justice, it is extremely stunning and flattering. This is one of those products that you can wear every day, even though it is shimmer, without looking like you belong in a nightclub. When applied to the cheeks as blush and above for a highlighting effect, it allows your cheekbones to stand out and people will wonder how you're so naturally beautiful. The sign of a great face product is that it looks natural when you put it on, and this is exactly that. The texture is soft and the color payoff is amazing, the colors are not too bright, like some of the Tarina Tarantino or MAC colors tend to be, it is the right amount of color and there is no fall-out or waste. The product is a generous size and there are four shades of color to choose from. There is a highlight white tone, a ballet-pink shimmer, a mauve-rose blush and a fuschia pink blush. However, the fact that you can mix them all together in whichever way you want allows for uniqueness and creativity on your part. I highly recommend this product, it's one of those that get 100% from me.

Urban Decay Grifter Eyeshadow
This is one of my favorite eyeshadows. You have to realize the gravity of that statement when I say this about an eyeshadow that is not from MAC. Urban Decay's color payoff in this shade is brilliant, you get exactly what you see, you can wash the color out a little bit by applying it with a light hand or you can increase its potency by using a mixing medium or Visine when you apply it. Regardless, this is a product that looks great on fair skinned girls with brown eyes. It's got a quite a bit of pizzazz, some may not be comfortable wearing it at work because of the glitter inside of it. The glitter speckles can be quite large and if you have sensitive eyes, then I do not recommend this eyeshadow. I'm lucky enough to be able to wear it and I love it. This product isn't quite as silky smooth as the others I bought this haul, but it's not bad either. It's a good product for a good price ($17 retail) that you will get a ton of usage out of (I get hundreds and hundreds of applications from one of these pots). Just because it might not be for everyone and it's not from the best company ever made, I'm giving this product an 85%, but I would definitely recommend this to you.

Kat Von D True Romance Eyeshadow Palette in Saint
Not particularly liking Kat Von D's style in general, I was reluctant to purchase her makeup and that's why I've waited until I completed my thorough research and asked as many opinions as I could about her products. Can I just say that I was blown away by the quality of this palette especially when comparing it to the price (it retails for $35). The similar predecessor of this palette is Urban Decay's Naked palette, which I also have, and the difference here is that Kat Von D's formula is a lot softer to wear while the colors are vibrant and beautiful, you probably have to use less of this product to get the color you want than of the Urban Decay one. Don't get me wrong, I love them both, but this palette seems a little more practical to me because it has a lot less glitter-specks (only the color '<3' and 'bookworm' have them) and they are very sheer. The palette also comes with her autograph pencil liner in black and this formula is comparable to the Urban Decay 24/7 eyeliner. This palette gets a 95% on my scale and it only doesn't achieve perfection because I wish there were even more colors and the palette was a little larger. However, the packaging is darling, the tin is made of metal and not cardboard like most palettes out there. I do wish that 'Pray For Me' was a little darker when swatched and the camera did not pick up the intensity of '<3' but trust me it really does look like the color you see in the palette.

Korres Wild Rose Compact Powder
I have read stellar reviews on Korres products in general but I've never been drawn to them until I randomly was walking through Sephora and touched this powder out of curiosity. Swatching this item feels like you are running your finger through a cloud. It most certainly is a far cry from MAC's studio-finish powders which are a little harsh to the touch. I don't yet know what kind of coverage this gives, but I tend to use my powder after foundations and this will work perfectly for me. Another bonus is that their 02 Golden Fair color is exactly my skin-tone and I rarely find my exact warmish pinkish hue in any makeup brand. I'm thrilled to try this out, you basically can't even see the powder on my skin in the swatch, but I assure you it is there. I give this product an 80% so far because I have yet to try it and I wish it had a little bit of shimmer in it for an even healthier glow (although I realize it's not practical to wear shimmer everywhere, I'm going to try to impress upon you that we should all always be wearing a bit of shimmer). Also, this didn't rate as high on my scale because I just can't get as excited about a powder as I can about eyeshadows, and the packaging was just bland. It opens up to reveal a little sponge underneath the product, which thoroughly annoyed me, because I thought there was going to be a lot more product (as the case would lead to believe) than there truly is. However, this is one of those products that is healthier than the rest because it is formed without parabens, aluminums and other nasty chemicals we shouldn't be putting on our faces, so I guess beauty and quantity suffer for health. It has a pleasant scent, sheer coverage and reduces shine, all bonuses when it comes to powder compacts. It's also $28 which is not quite as much as some of the other powders on the market.